
| 일 | 월 | 화 | 수 | 목 | 금 | 토 |
|---|---|---|---|---|---|---|
| 1 | 2 | 3 | 4 | 5 | ||
| 6 | 7 | 8 | 9 | 10 | 11 | 12 |
| 13 | 14 | 15 | 16 | 17 | 18 | 19 |
| 20 | 21 | 22 | 23 | 24 | 25 | 26 |
| 27 | 28 | 29 | 30 |
- MariaDB
- PG-Strom
- OGM
- graph database
- BRIN
- HTML Special Entity
- Next.js
- 서브라임 텍스트
- STS
- exit code = -805306369
- orioledb
- Spring
- tomcat
- typeorm
- JSP
- tortoise SVN
- springboot
- Java
- NestJS
- Can't load AMD 64-bit .dll on a IA 32-bit platform
- Eclipse
- Maven Project
- maven
- HTML Code
- Spring Cloud
- Spring Boot
- loadcomplete
- NextJs
- Windows 10
- PostgreSQL
- Today
- Total
Undergoing
Spring Cloud 개요 및 기본 구조 세팅 본문
Spring Cloud의 정의(spring.io 발췌)
- 개발자에게 분산 시스템에 대한 일부 공통 패턴을 제공하는 툴
- 구성 관리, 서비스 검색, 회로 차단, 지능형 라우팅, 마이크로 프록시, 제어 서비스, 일회용 토큰, 글로벌 락, 리더십 선출, 분산 세션, 클러스터 스테이터스)
- 분산 시스템의 조정은 보일러 플레이트 패턴으로 이어지며 Spring Cloud 개발자를 사용하면 이러한 패턴을 구현하는 서비스와 애플리케이션을 신속하게 구축할 수 있음
- 개발자 자신의 랩톱, 베어메탈 데이터 센터 및 Cloud Foundry와 같은 관리 플랫폼을 포함한 모든 분산 환경에서 잘 작동함

Spring에서 제공하는 구조도는 위와 같은데, 여러 블로그들을 찾아본 결과 상황에 맞게 다양한 구조를 볼 수 있었다.
그래도 기본 골자는 저 구조도를 따라감
여러 레퍼런스들을 참고하여 Spring Cloud 테스트용 샘플링을 다음과 같이 구성하였다.
- Config
- Config Server
- Client
보통 config용 yml은 github을 통해 관리하는 것 같아 이를 준수. Config Server에서는 Config의 설정들을 가져오고, 이를 Client에 반영한다.
이에 따른 구성 개요도는 다음과 같다.

1. Config 작성
우선 적당한 git repository를 다음과 같이 만들어 두었다.
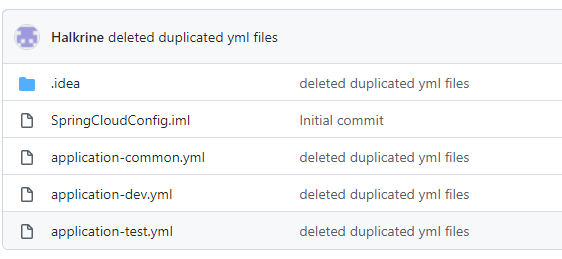
파일명은 {app name}-{type}.yml의 형태가 보편적인 것 같아 위와 같이 간단하게 설정해 두었다.
설정 파일은 다음과 같이 환경 별로 text를 리턴하게 해두었다.
- application-common.yml
test:
  hello: Test common
- application-dev.yml
test:
  hello: Test Dev
- application-test.yml
test:
  hello: Test test
2. Config Server
Gradle로 세팅. 어차피 Maven repository나 구글링하면 maven 환경 세팅도 있음
build.gradle에 다음 dependency 추가
dependencies {
    ...
    implementation 'org.springframework.cloud:spring-cloud-config-server'
    ...
}

dependencyManagement {
    imports {
        mavenBom "org.springframework.cloud:spring-cloud-dependencies:${springCloudVersion}"
    }
}
application.yml은 다음과 같이 설정
# application.yml
spring:
  application:
    name: SpringCloudConfigServer
  cloud:
    config:
      server:
        git:
          uri: https://github.com/Halkrine/SpringCloudConfig.git
          default-label: master

server:
  port: 8080
cloud:config:server:git은 config yml이 저장된 경로를 적어주고, default-label은 설정 안 하면 cmd에서 설정할 수 있다.
default-label은 config가 저장된 branch 세팅
이제 config와 config server가 연동 잘 되는지 테스트해 본다. server 구동 후 호출 endpoint는 다음과 같다(cloud.spring.io 발췌)
/{application}/{profile}[/{label}]
/{application}-{profile}.yml
/{label}/{application}-{profile}.yml
/{application}-{profile}.properties
/{label}/{application}-{profile}.properties
GET 방식으로 요청하여 결과를 볼 수 있으니, 다음과 같은 response를 받았으면 연결은 잘 되었다고 판단할 수 있다.

3. Client
다음과 같이 gradle과 application.yml 설정
dependencies {
    ...
    implementation 'org.springframework.cloud:spring-cloud-starter-config:3.0.2'
    ...
}
server:
port: 8081
spring:
profiles:
active: dev
application:
name: SpringCloudConfigClient
config:
import: configserver:http://localhost:8080Config Server의 port를 8080으로 하였기 때문에, config:import의 port가 8080임
active는 불러올 config 환경을 설정
Test를 위해 간단한 api 작성. 이는 yml에 설정된 값을 불러오기 위함이다.
@RestController
public class TestController {

    @Autowired
    TestService service;

    @RequestMapping(value="/hello")
    public String hello(){
        return service.hello();
    }
}
@Service
public class TestServiceImpl implements TestService {
@Value("${test.hello}")
private String hello;
public String hello(){
return hello;
}
}dev 환경에 대한 api call 시 다음과 같은 결과를 받을 수 있다.

간단하게는 위와 같은 구조로 config-config server-client를 구성할 수 있고, 나아가서 RabbitMQ나 Kafka 등의 메시지 브로커를 얹어서 활용할 수 있다. 또한 eureka 등으로 환경을 제어하기도 하는데, 이건 좀 더 연구해봐야 할 것 같다.
참고 사이트
[Spring Cloud] Spring Cloud Config Server, Client 설정하기